
Real-Time Fraud Detection
A Hands-On Guide to Confluent Flink
Introducing Confluent Flink
For data-driven businesses aiming to stay competitive, real-time data processing and analysis have become indispensable.
The event-streaming platform Apache Kafka has played a major role in the industry since its introduction in 2011, due to its ability to handle high-throughput, fault-tolerant, and scalable data streams.
When it comes to more complex event-driven applications, real-time analytics, and continuous data pipelines, Apache Flink has emerged as one of the go-to technologies. Specifically designed for stateful stream processing, Flink excels at handling time-based operations and windowing, making it particularly well-suited for scenarios that require precise event-time handling and sophisticated state management.
Combining both these technologies results in a powerful solution for real-time scalable data processing pipelines that handle both event streaming and complex processing with minimal latency and high reliability.
Confluent Cloud, founded by the creators of Apache Kafka in 2014, builds on this exact combination. Using Kafka at its core, it offers seamless integration with Flink and tops it off with the advantages of serverless cloud computing.
Confluent’s newest feature, the integration of AI Model Inference on Confluent Cloud for Apache Flink, promises an all-round data tool, ranging from data inference and processing up to data analysis using ML models.
In this blog post, our goal is to provide a hands-on tutorial for those who want to try out Confluent Flink.
Hands-On: Our experience using Confluent Flink
We tried to simulate real-time fraud detection using Confluent Kafka, Flink and Flink AI remote model inference. As our dataset we chose the Kaggle IEEE-CIS Fraud Detection Dataset.
In the following we will share our experience and show you step by step how to implement this use case. You can find our code on Github. Now, let’s get started!
Step 1: Create Environment and Cluster on Confluent Cloud
First, we created a new environment and cluster for our application on the Confluent Cloud platform. Refer to this article for a detailed guide on managing clusters in Confluent.
Step 2: Create a table with schema
Since we are planning to use Flink for data transformations, we need to create a Flink table in Confluent cloud.
Flink tables are dynamic tables to facilitate the manipulation and processing of streaming data. Every Flink table in Confluent Cloud is backed by a Kafka topic.
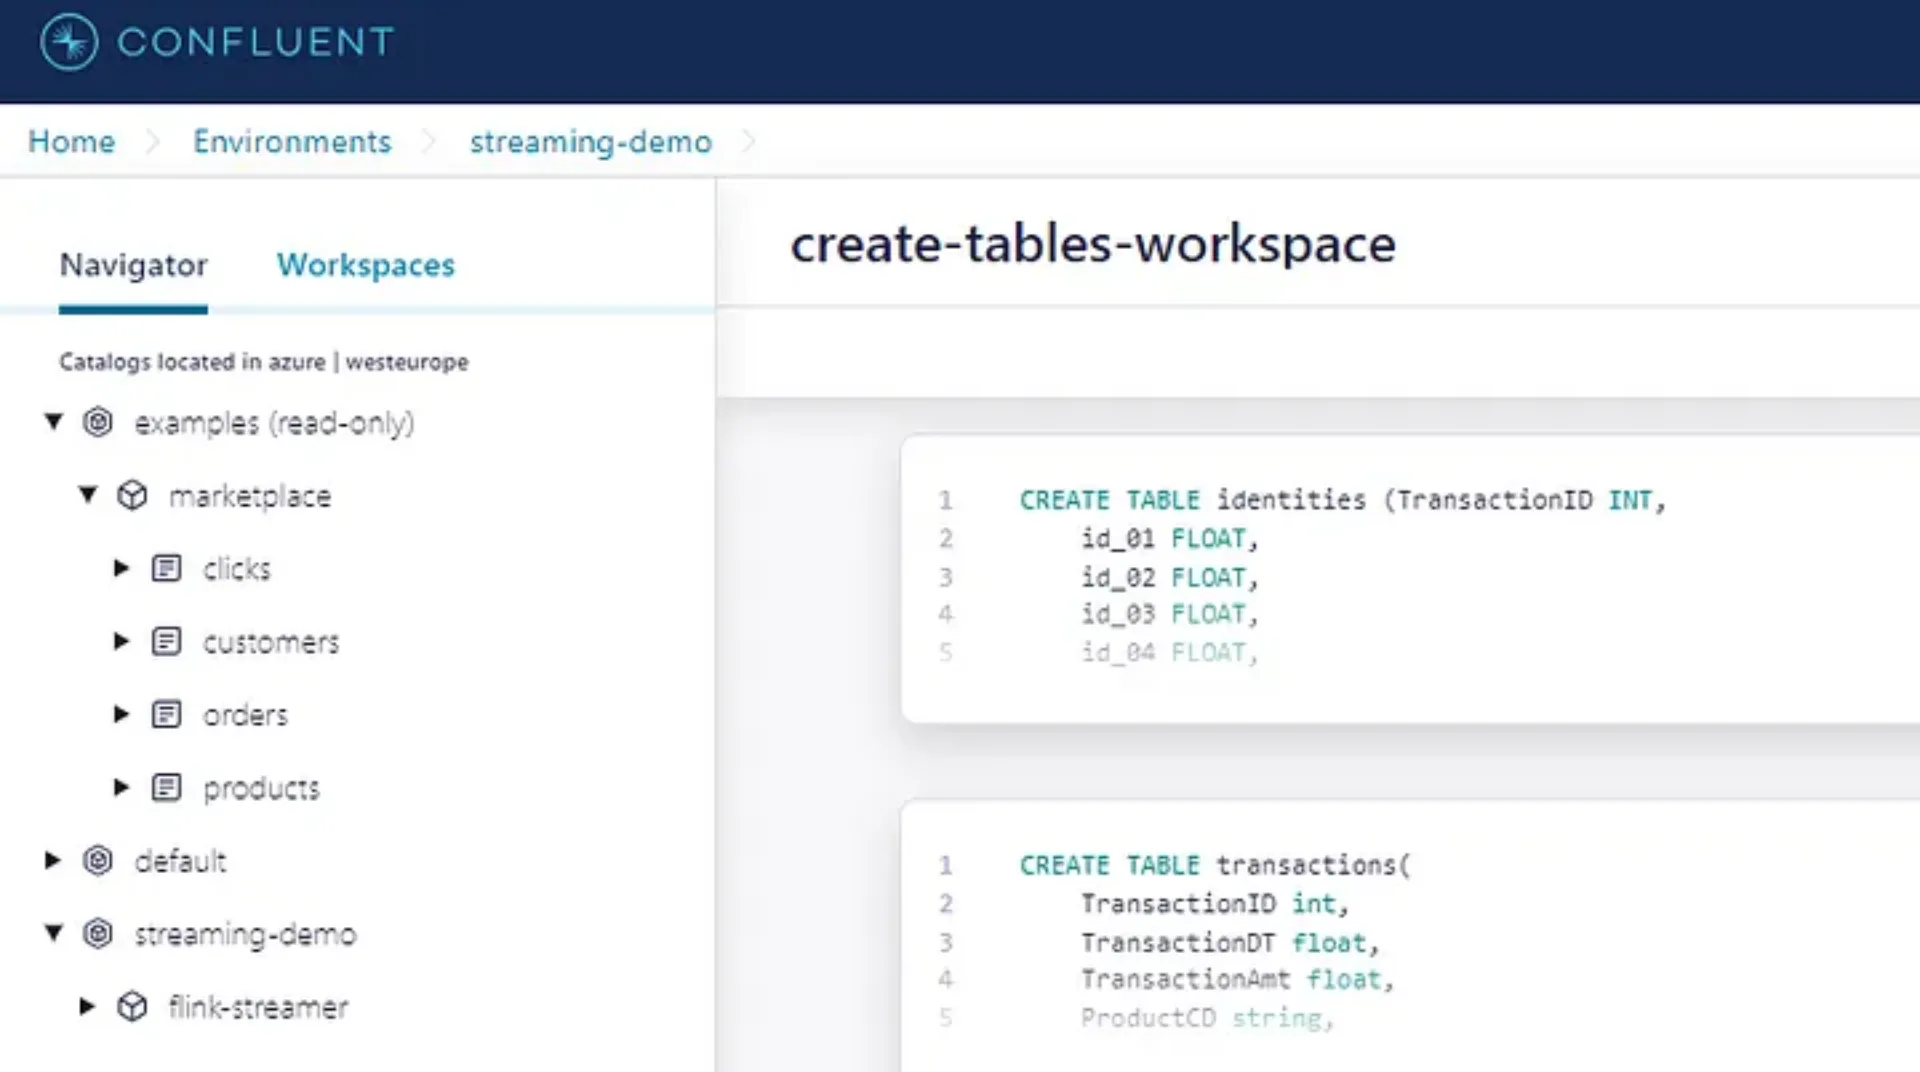
We can define and transform our Flink tables in Confluent’s Stream Processing workspaces. Click on “Stream processing” in the sidebar, then choose your Environment and “Create workspace”. It’s important to note that the Flink compute pool must be in the same cloud and region as the Kafka cluster. If not, Flink will be unable to access the data stored in the Kafka cluster.
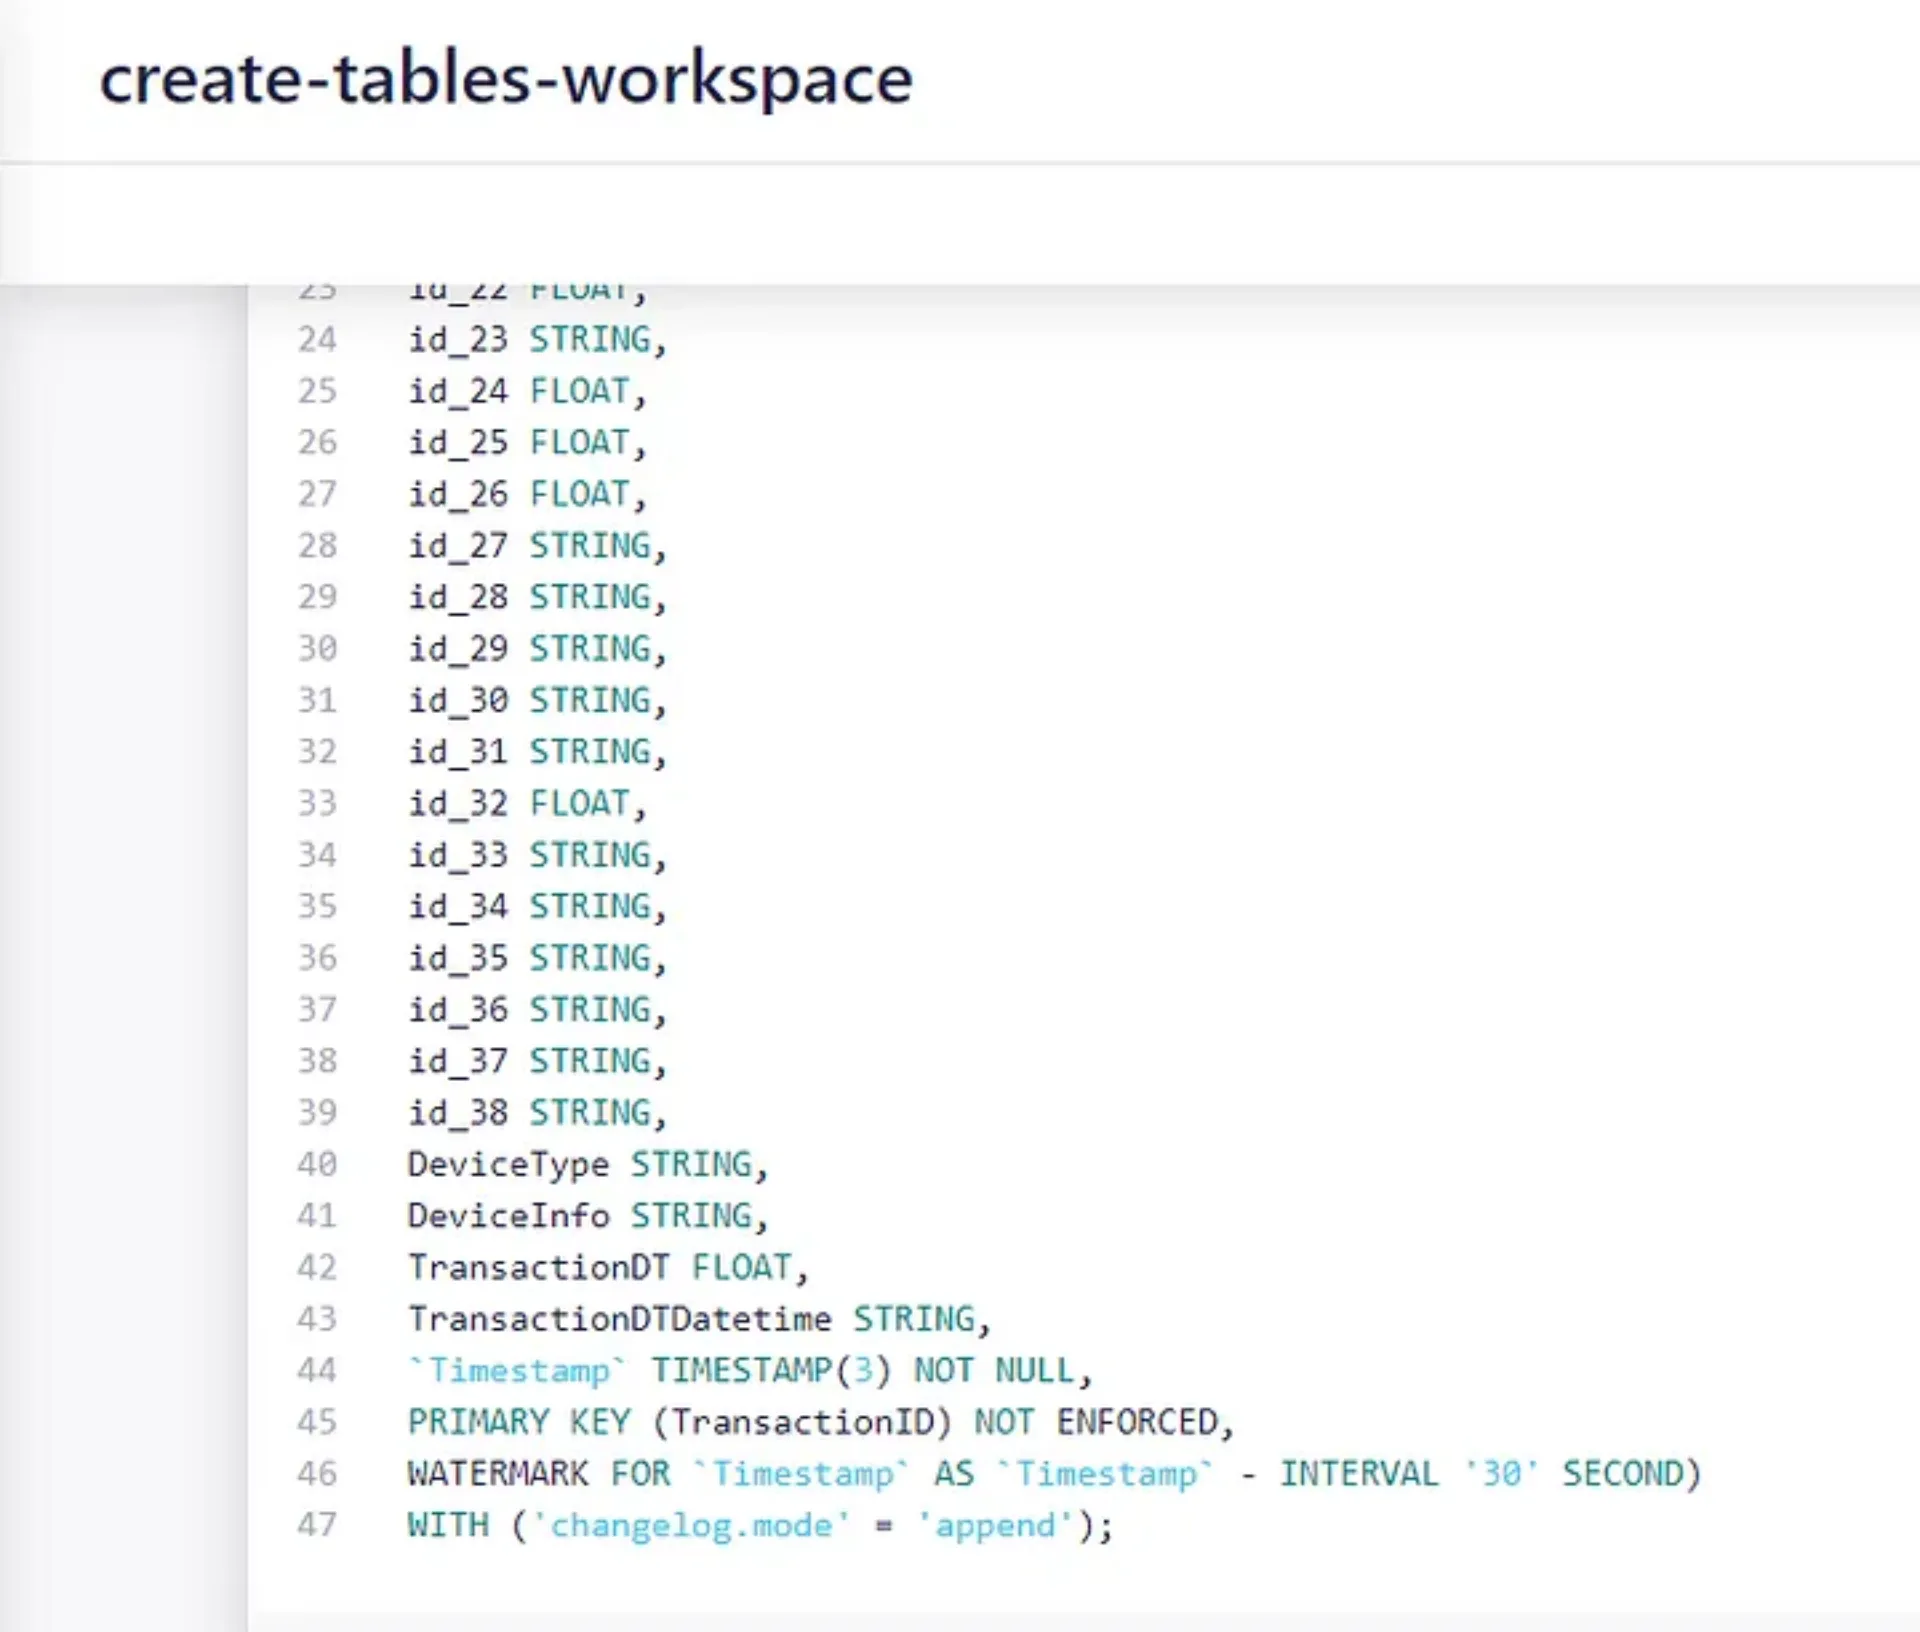
Let’s now create our tables “identities” and “transactions”.
Later on, we’ll use an interval join to join both tables. As of now, Confluent Flink does not allow interval joins on changeable tables. Therefore, we have to define our tables as append-only. We use the changelog property for this purpose, relying on the fact that “essentially, a stream is the changelog of a table”.
Step 3: Create Service Account and API Keys
Our local Kafka Producers will read the CSV-files from the Kaggle dataset and write each record into the Kafka topics underlying our Flink tables.
For this to work, we need
- A Service account with API-Credentials for every Producer
- A defined Avro Schema matching our table structure
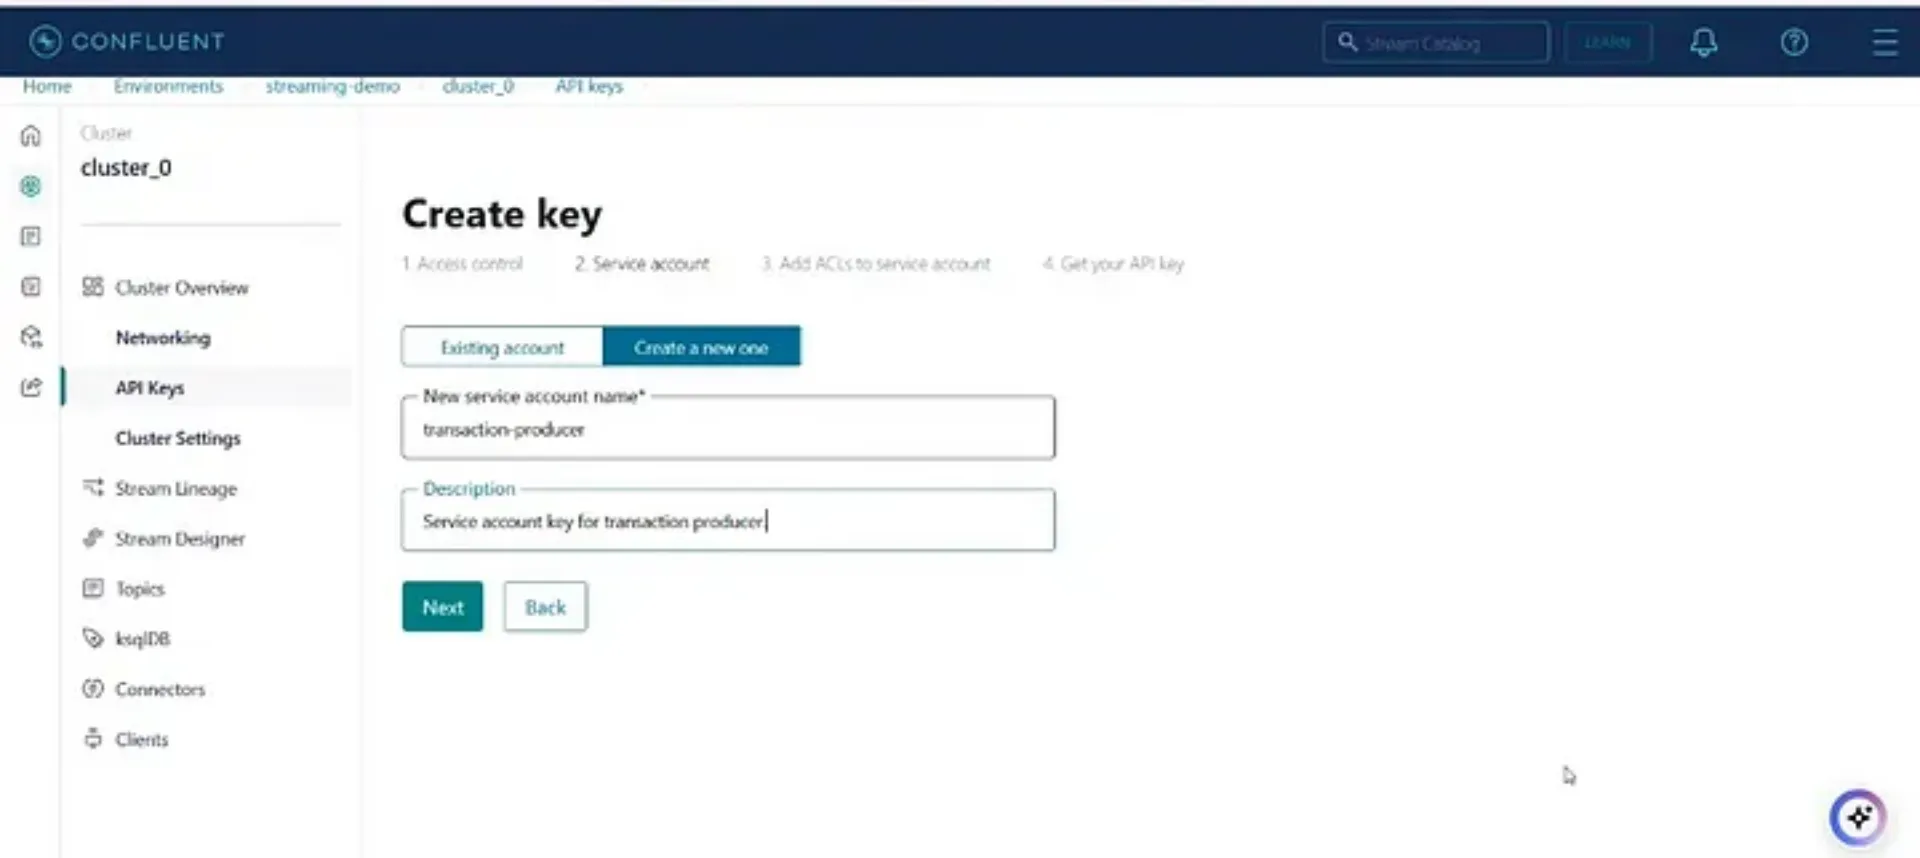
To create the credentials, go to your cluster and click on “API Keys” in the left sidebar, then click “Create key”. Next, create a new Service account and name it. Then map it to the transactions topic:
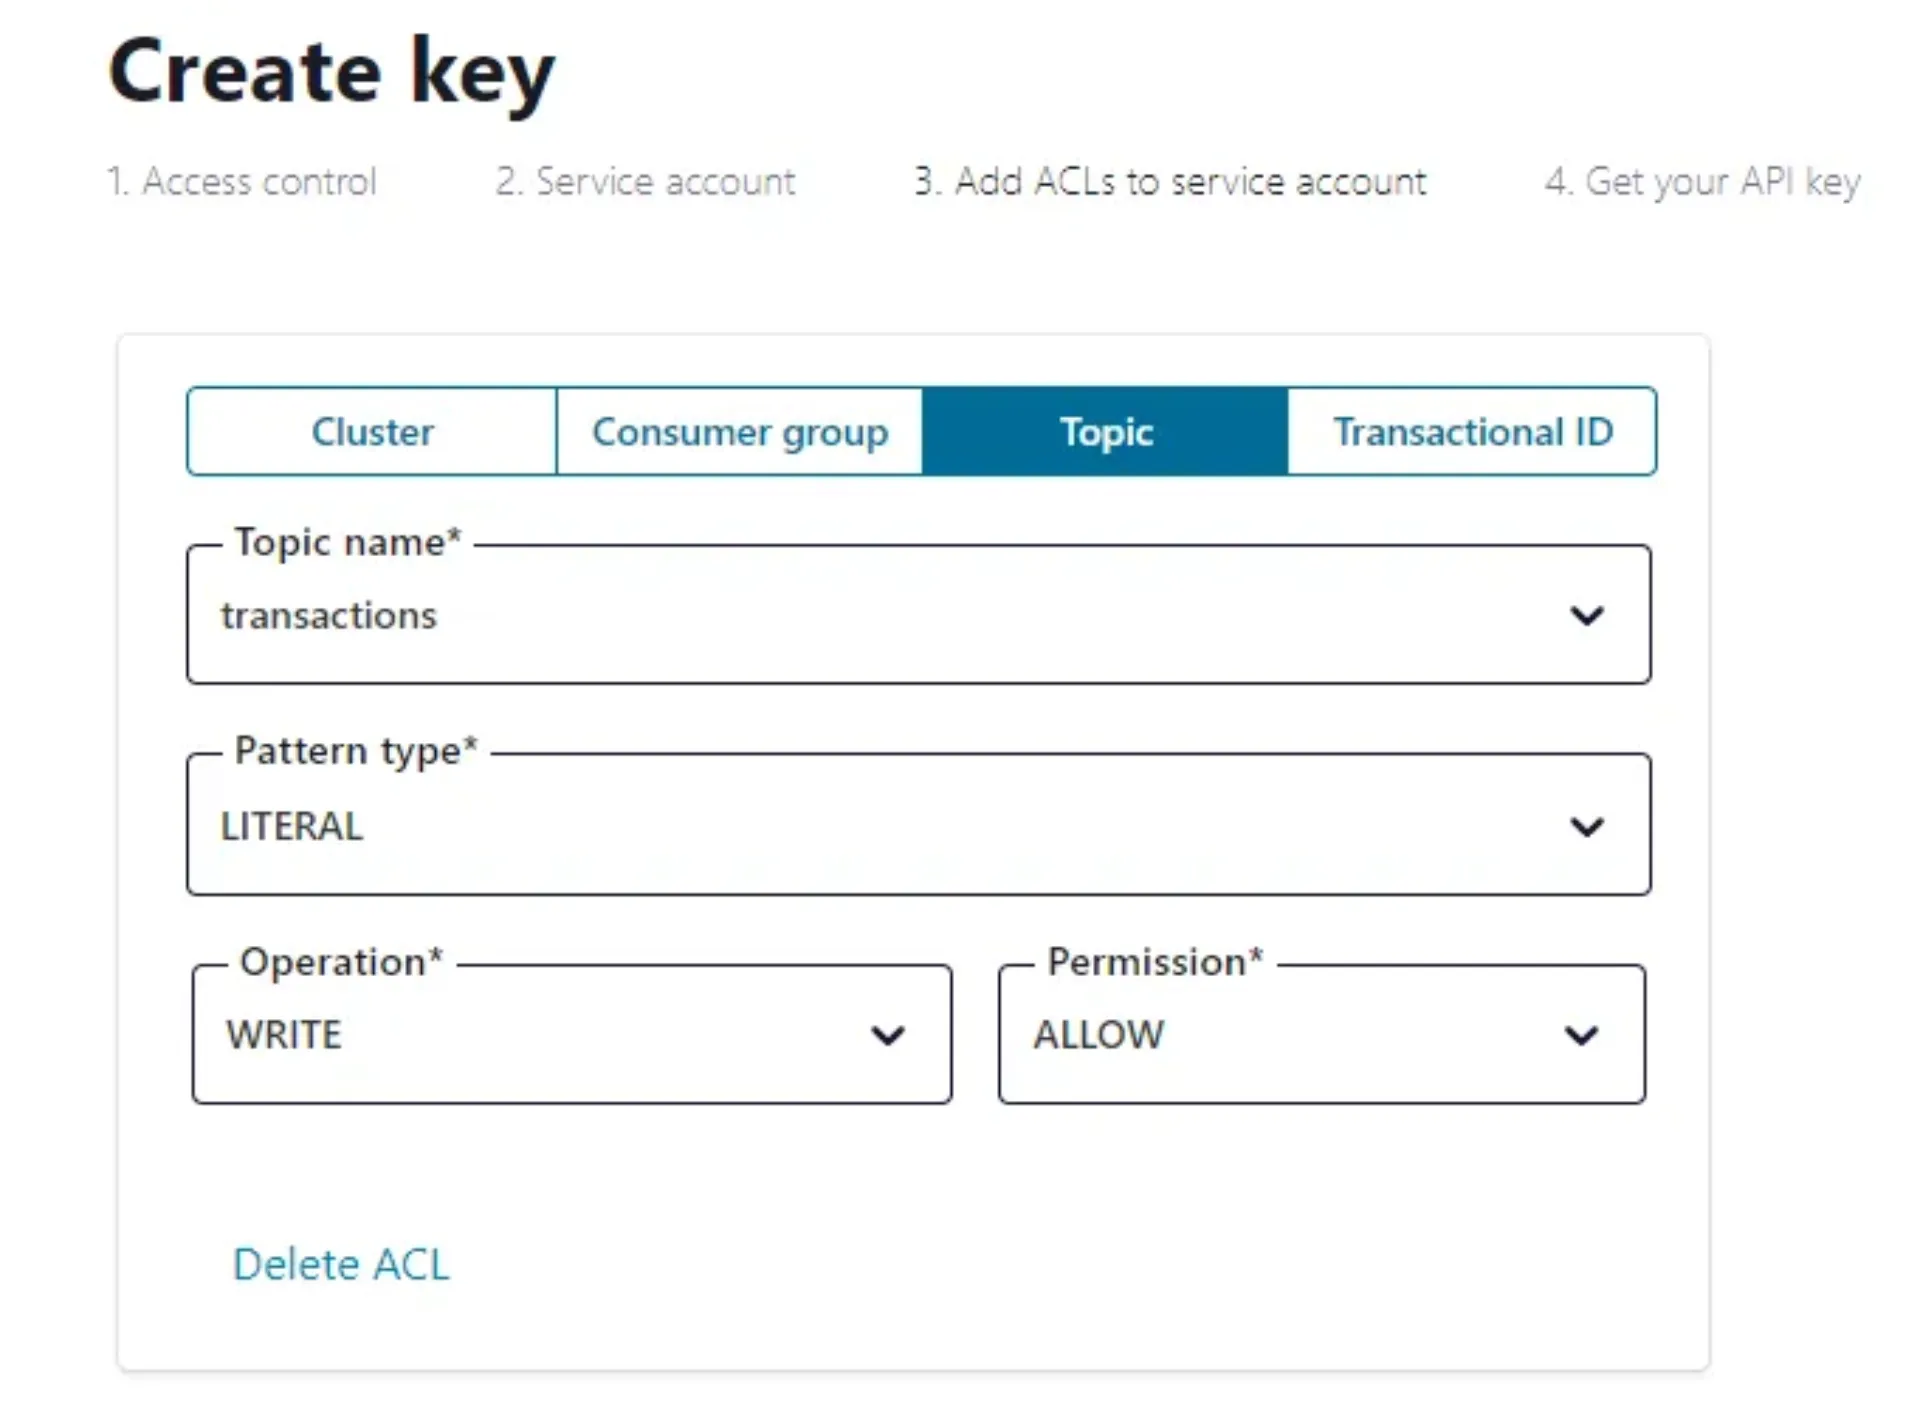
Download and save the generated keys and repeat the procedure for the identities topic.
The last missing credentials are the API-Keys for the Schema Registry.
Go to your environment. In the sidebar on the right, scroll down to the Stream Governance API. Copy the displayed endpoint.
Then under Credentials, click on “Add key”, in the next window “Create key”:
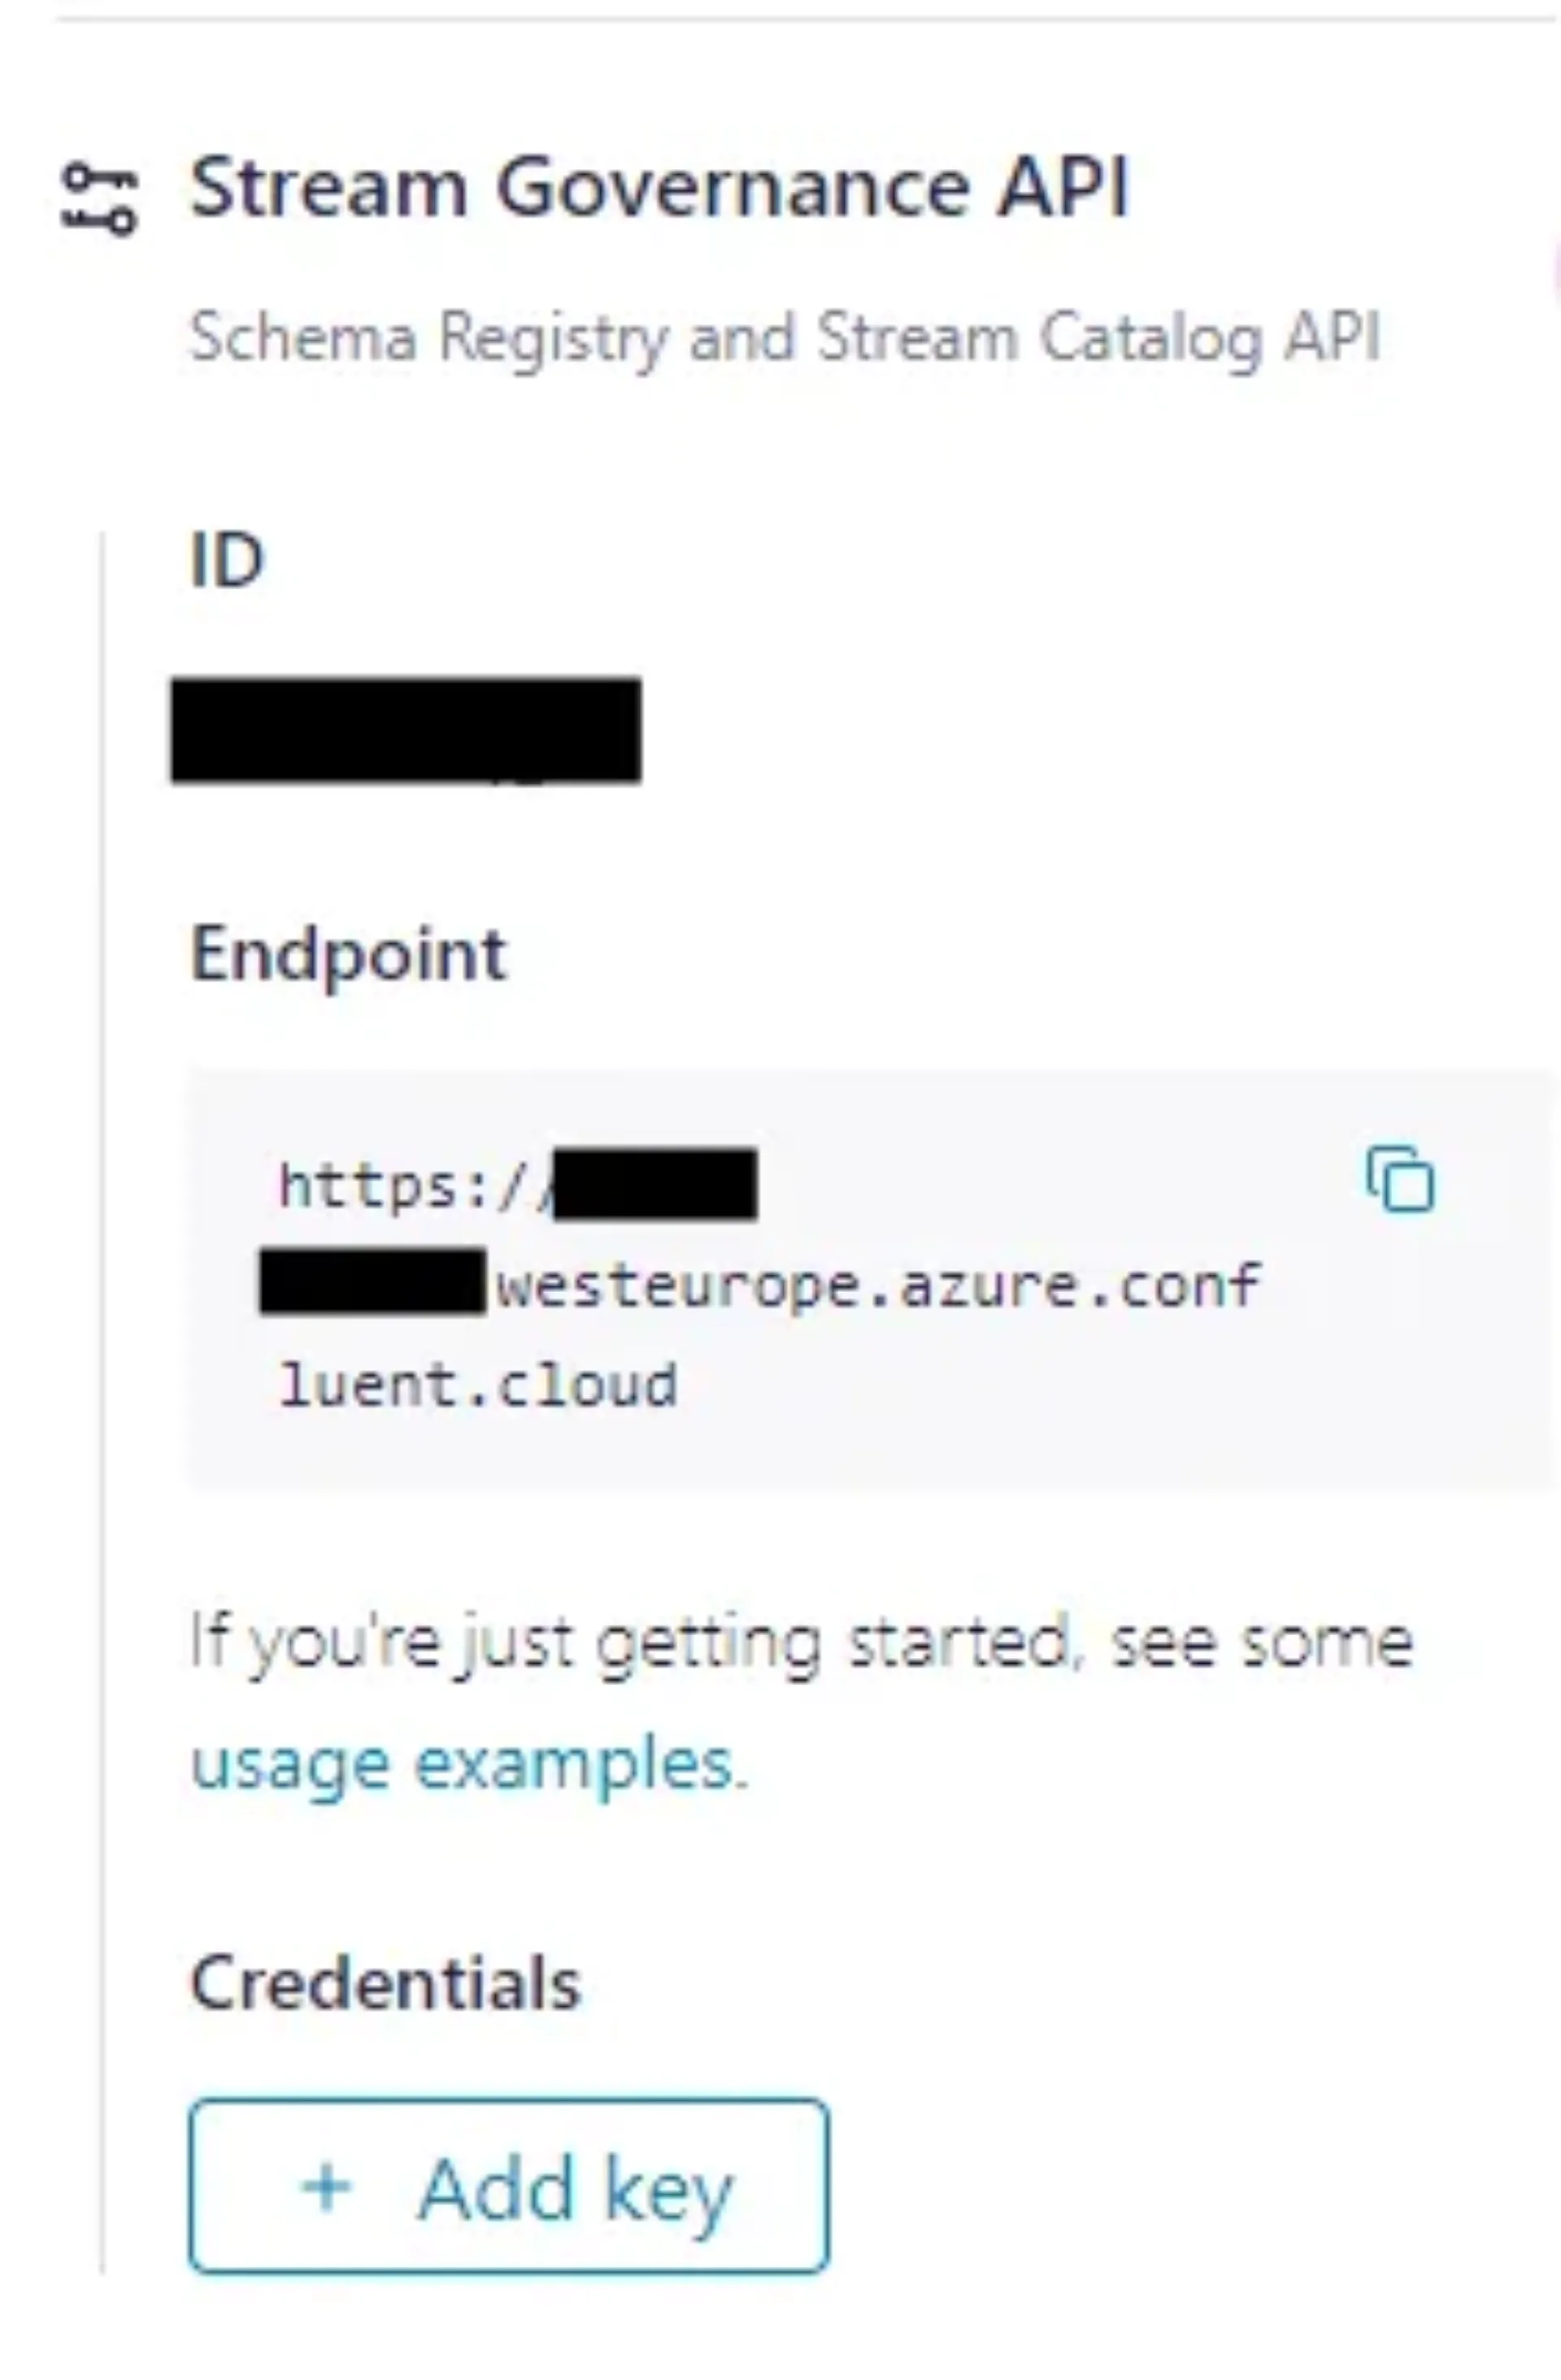

Download and save the generated keys.
Step 4: Ingest and Process Data
We developed two producer scripts using the Confluent Kafka Python library. These scripts read the transactions and identities datasets and ingest the events into Kafka. You can find the scripts in the GitHub repository. To run them locally, adjust the bootstrap server URL, topic credentials, and schema registry credentials, then execute both scripts in parallel.
Now that the producer scripts are writing data to our Kafka topics, the next step is to join both datasets into a new table. Since we are joining streams, we will join them using an interval join to ensure that only events within a relevant time window are matched. In contrast, a regular join would result in excessive memory consumption due to an ever-growing state.

In addition, we want to engineer some new features as part of our data preparation. We extract time characteristics of the transaction and add them to the table as additional columns:

Now, we are ready to move on to the next step: The real-time analysis of our streaming data using remote AI model inference.
Step 5: Analyse your data using a remote ML model
For our use case, we trained a simple fraud detection model on the above mentioned Kaggle IEEE-CIS Fraud Detection Dataset and deployed it to Azure Machine Learning. The AI model providers supported by Confluent (at the time of writing this article) are AWS Bedrock and Sagemaker, Azure OpenAI and Azure ML, OpenAI and Google Cloud VertexAI.
An in-depth explanation of how to deploy a model to Azure ML would go beyond the scope of this article. You can find the documentation here. However, we will cover some details on how to parse the input data sent from Confluent Flink to Azure ML.
We will connect to our model’s endpoint using Confluent CLI. If you haven’t set it up yet, you will find the instructions here. The creation of a connection to a remote model is documented in the Confluent docs. Anyway, this is how we did it:
First, copy your endpoint’s name and URL. Then, login into your Azure CLI and get your endpoint’s API key:

Now, login to Confluent CLI and create the connection:

Next, create a model object with Flink. You need to specify the input feature names and types, the output name and type, and a few options related to the model provider:
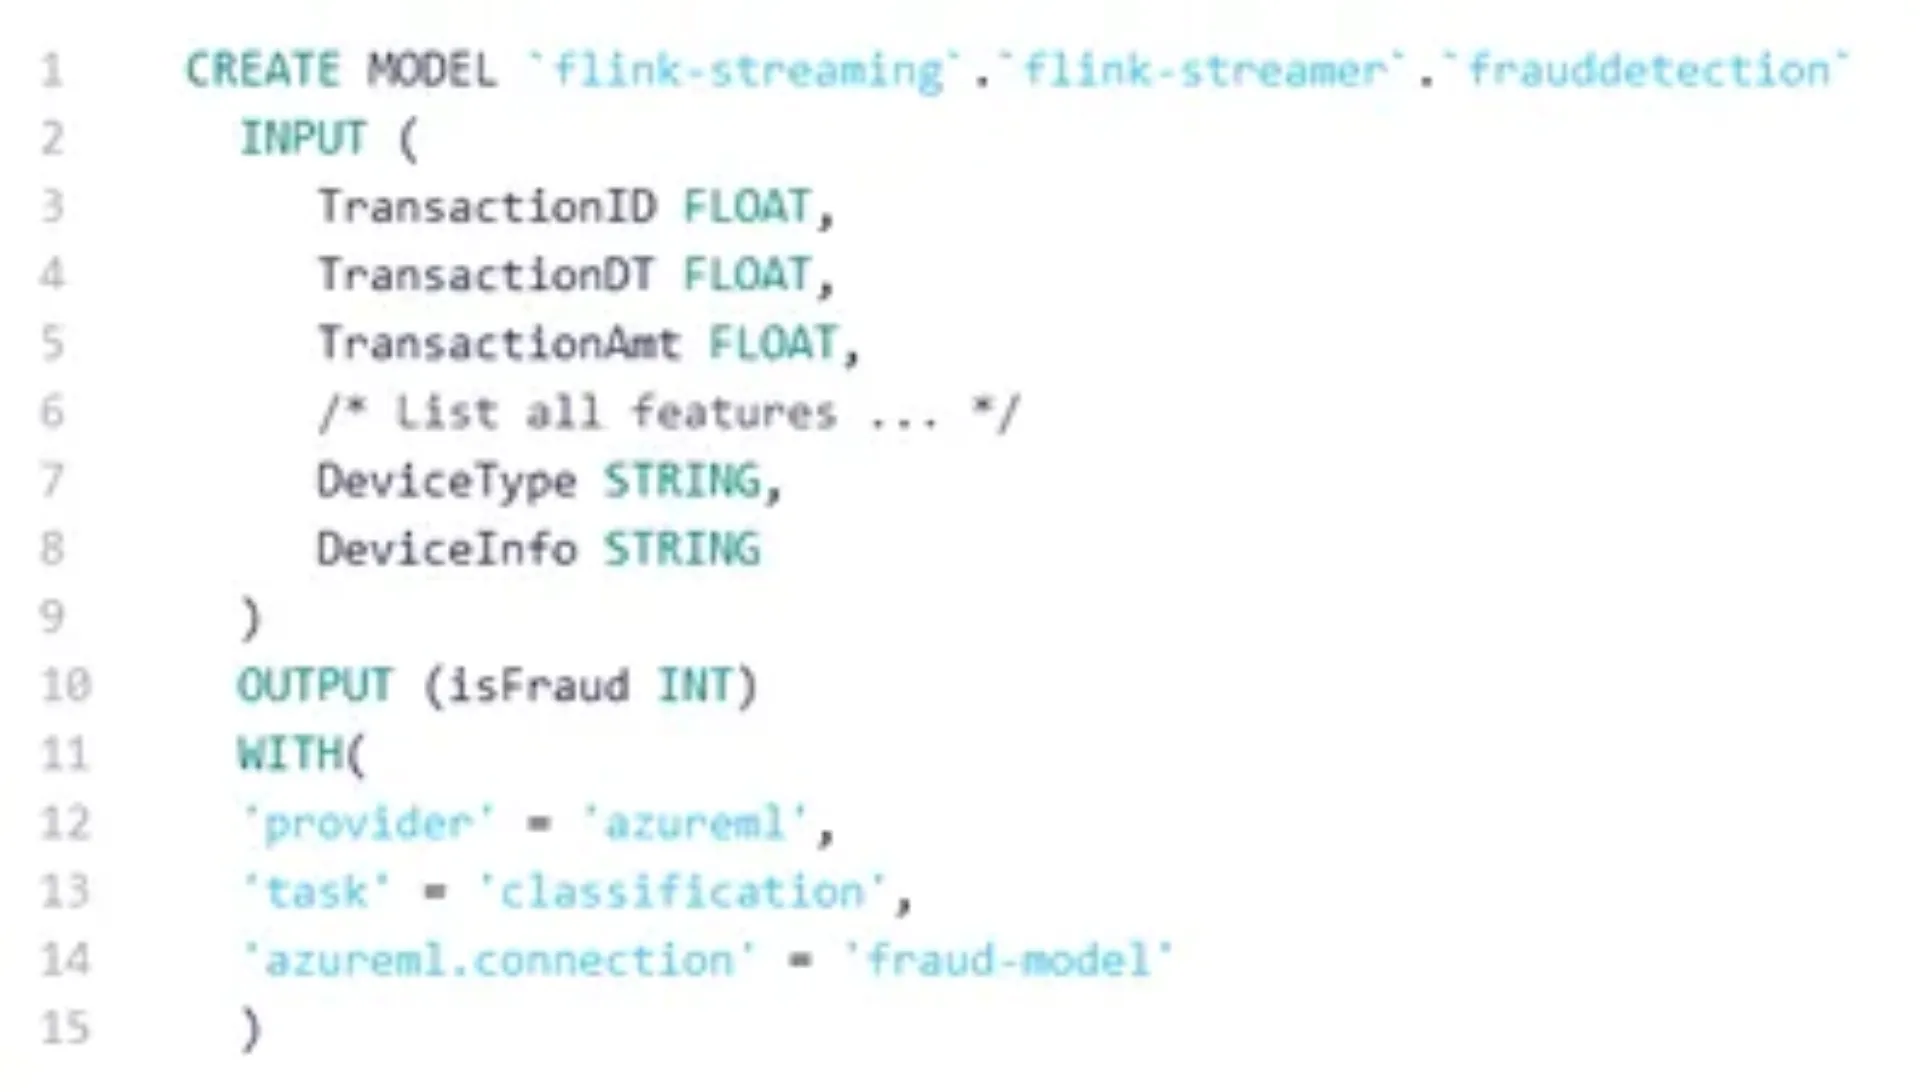
Now the model can be used to make predictions on our input data stream:

The Azure ML endpoint requires a scoring script that handles loading the model, parsing the input, passing it to the model, and returning the prediction. Since Confluent Flink sends the model input as a JSON object, where each key represents a feature name and its corresponding value, the scoring script must first parse the JSON before passing the data to the model. The AzureML scoring script we used is available on our GitHub. Additionally, the repository includes the Dockerfile for the Azure ML environment and the ONNX model file of the trained model.
While this article focuses on the core integration, it’s worth noting that Flink AI also offers a model versioning feature. More details can be found in the Confluent documentation.
Conclusion
Confluent Cloud offers an all-in-one solution for data-centered use cases, with the new Flink AI feature smoothly integrating ML models into a modern data pipeline. In the past, we deployed a similar project using Terraform and Apache Flink on a Kubernetes cluster hosted in AWS. Setting up a production-grade Flink and Kafka cluster required significant effort. By contrast, getting started with Confluent Flink feels refreshingly simple and far less labour-intensive.
We think that Confluent Flink has the potential to significantly streamline the future of data streaming and real-time analytics. Altogether, Confluent Cloud is a powerful all-in-one data platform showing huge potential for data-centered businesses. We are very excited to see further developments.


